The choice between clay and wood isn’t a matter of difficulty, but a creative dialogue: do you prefer to add and shape, or to remove and reveal?
- Air-dry clay is the perfect ally for beginners without a kiln, offering great flexibility to experiment with 3D forms.
- Wood, such as Canadian basswood, offers a more meditative and subtractive experience, where every movement counts toward revealing the hidden shape.
Recommendation: Begin your tactile journey with clay for its generosity and ability to forgive mistakes. Then, once your patience and vision have sharpened, explore wood for the introspective experience of carving.
Faced with the constant buzz of screens, there is a deep-seated desire to reconnect with the tangible. The need to create with one’s hands, to feel the material transform under one’s fingers, is a quest for meaning as much as it is a hobby. Sculpture, in its apparent simplicity, offers this way out. But where to begin when you don’t have a professional studio? The question often boils down to a duel: clay versus wood. We often think of it as a technical choice, a matter of tools or complexity.
But what if the true key wasn’t in the technique, but in the type of dialogue you wish to start? Clay, generous and malleable, invites a constant exchange—an “additive” sculpture where you can add, remove, make mistakes, and start over. It develops spontaneity. Wood, on the contrary, demands patient listening—a “subtractive” sculpture where every chip removed is a definitive step toward the revelation of a form. It teaches foresight and delicacy. This article is not a simple technical comparison. It is an invitation to discover which sensory dialogue is right for you, in order to transform your desire for creation into a fulfilling and patient practice, right from your living room.
To guide you in this intimate and practical choice, we will explore the specificities of each material together. From the first steps of moving from 2D to 3D to the finishing touches that will sublimate your work, this guide is designed to accompany you in your new creative adventure.
Summary: Your guide to choosing between the dialogue of clay and wood
- Why is it so difficult to transition from 2D drawing to volume sculpture?
- How to create your first roughing tools using kitchen items?
- Air-dry or kiln-fired: which clay to choose if you don’t have a ceramic kiln?
- The trapped air bubble mistake that destroys your work in the kiln
- When to sand your sculpture: the “leather-hard” stage you shouldn’t miss for finishing
- Why does mixing all your colors always result in a muddy brown?
- How to sculpt for hours without pain: wrist posture?
- Watercolor or Acrylic: which paint allows you to relax without being a drawing expert?
Why is it so difficult to transition from 2D drawing to volume sculpture?
The transition from paper to material is one of the greatest challenges for the beginning creative. Our entire visual education, from books to screens, has conditioned us to think in two dimensions (height and width). Sculpture forces us to integrate a third coordinate: depth. This isn’t just a technique to learn; it’s a true re-education of the eyes and the brain. Your hand, accustomed to sliding over a flat surface, must learn to grasp an object in space, to understand its hidden faces, its solids, and its voids.
The Saint-Laurent pebble exercise is an excellent introduction to this new perception. Take a simple pebble, observe it, touch it. Then, try to draw it from four different angles: front, back, profile, and top. You will notice that each drawing only captures one facet of the object. Sculpture aims to reconcile them all into a single volume. By modeling, you are no longer just an observer; your entire body participates, your hands and your gaze creating new neural connections to think and feel in 3D.
The key is to work by continuous rotation. Rather than sculpting one side and then moving to the next as if filling in boxes, constantly rotate your piece. Observe how a modification on one side impacts the silhouette of the other. It is this permanent dialogue with the object from all angles that will truly bring you into the world of volume.
Accepting this paradigm shift is the first step in developing the patience and fine motor skills necessary for this art.
How to create your first roughing tools using kitchen items?
One of the biggest barriers to entry in sculpture is the belief that you must invest in an arsenal of expensive tools. This is a myth. Your kitchen is probably the best art supply store to start with, especially for the dialogue with clay. Before buying modeling tools or wire loops, open your drawers and rediscover your utensils with a sculptor’s eye. This approach not only connects you to the “handmade” spirit, but it also forces you to be inventive and understand the function of each tool through experimentation.

A simple starter kit can be assembled in minutes. A fork is perfect for scoring the surface and creating textures, a round-tipped knife for cutting clean blocks of clay, and a spoon for smoothing curves and hollowing out concave shapes. These everyday objects become extensions of your hands, allowing you to refine your gesture without the pressure of using a “professional” tool. Don’t forget an old sponge for wetting and smoothing, as well as plastic wrap to preserve your work in progress.
In fact, to answer a frequent question, it is precisely this plastic wrap or a thick trash bag that will allow you to keep your opened block of clay fresh for weeks or even months. Simply wrap the clay well after lightly moistening it so that it retains all its plasticity. Your first studio is already there, within reach, ready for the dialogue with the material to begin.
This material simplicity frees the mind and allows one to focus on the essential: form and touch.
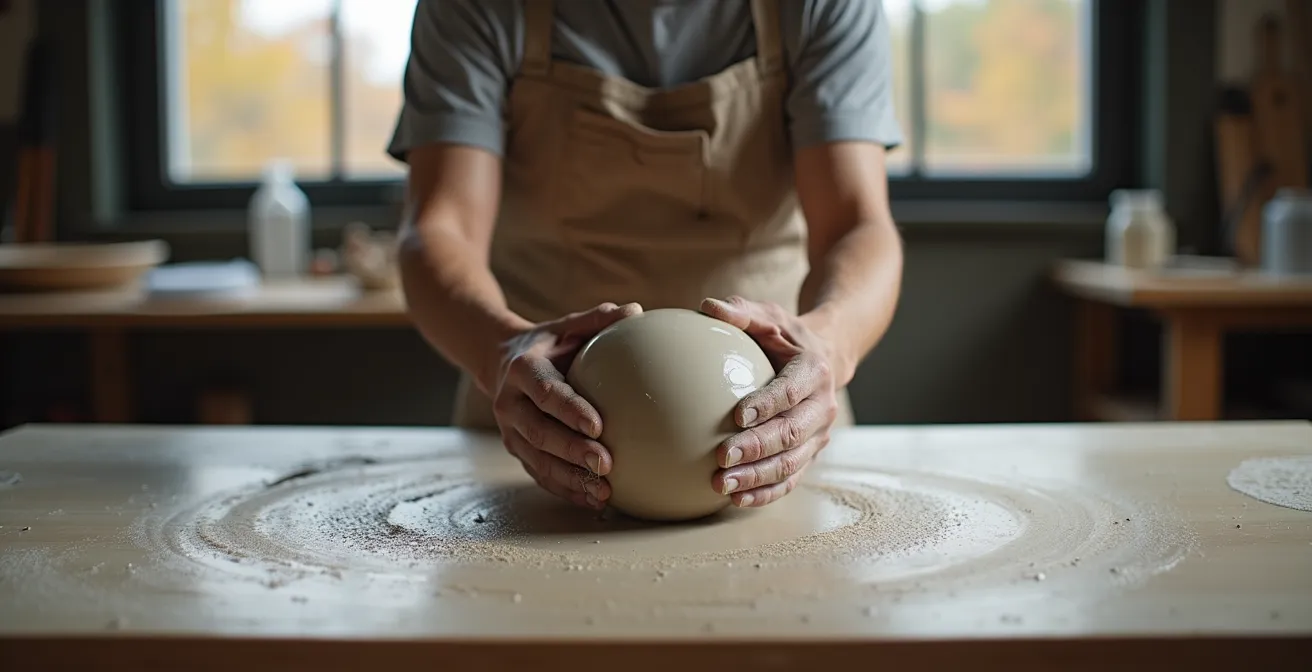
Air-dry or kiln-fired: which clay to choose if you don’t have a ceramic kiln?
For those starting without a studio, the question of the kiln is central. Traditional ceramics, beautiful as they are, require firing at over 900°C, a major logistical constraint. Fortunately, a solution exists, and it has become extraordinarily high-quality: air-dry clay. Contrary to popular belief, it is not “playdough for kids.” Modern formulas, enriched with cellulose fibers, offer strength and finesse that make them a true alternative to ceramics, often called “cold ceramics.”
These clays have the advantage of drying in the open air, reaching their final hardness after drying for 1 to 4 days depending on ambient humidity, an important factor to consider with the Canadian climate. They are perfect for beginners because they allow focus on modeling, shape, and texture without worrying about the complex chemistry of firing. Many brands are easily accessible in Canada, each with its own specificities.
To help you see more clearly, here is a comparison of some popular options available at retailers like DeSerres.
| Brand | Price at DeSerres | Texture | Final Strength | Tendency to Crack |
|---|---|---|---|---|
| DAS | $8-15/kg | Light, fine | Medium | Low if dried slowly |
| Sio-2 PLUS | $12-18/500g | Soft, very plastic | Very strong | Very low (cellulose fibers) |
| Sculpey Air-Dry | $15-20/kg | Supple, easy to smooth | Good | Medium |
| COLORPLUS | $14-16/500g | Smooth, odorless | Excellent | Low |
Choosing a clay like Sio-2 PLUS, known for its low tendency to crack, is particularly wise for starting out and avoiding many frustrations.
The trapped air bubble mistake that destroys your work in the kiln
Even if you opt for air-dry clay that doesn’t go in the kiln, managing air is a fundamental principle to respect. A trapped air bubble is a ticking time bomb. During drying, clay shrinks as it loses water. Air, however, does not shrink. This difference in behavior creates immense tension inside the material, which eventually gives way: that is the crack. In a kiln, the phenomenon is even more violent because the trapped water turns into steam and causes the piece to explode. With air-dry clay, the risk is an unsightly crack that ruins hours of work.
The secret to avoiding this drama is learning to “listen” to the clay and prepare it correctly. It’s not enough to just take the clay out of the package and start modeling. Proper wedging (kneading) is essential. By folding and slamming the clay, you drive out air pockets and homogenize its moisture. Similarly, when joining several pieces, you must always score the contact surfaces and apply a little slip (diluted clay) to ensure a perfect bond without trapping air.
Another point of vigilance concerns thickness. A sculpture that is too thick (more than 2-3 cm) will have difficulty drying uniformly, increasing the risk of cracking. For large pieces, professionals always hollow out the interior. This is a technique that requires a bit of practice but guarantees the longevity of your work. Similarly, a wooden armature inside air-dry clay is often a bad idea: wood is static while clay shrinks, which will almost certainly cause cracks.
Action Plan: Your anti-bubble and anti-crack protocol
- Wedging: Before starting, knead your clay for at least 5 minutes, folding and slamming it on your work surface to expel air.
- Assembly: To join two pieces, score both surfaces with a fork, dampen them, and press firmly to avoid trapping an air bubble.
- Thickness: Aim for a consistent thickness not exceeding 2 to 3 centimeters throughout your sculpture. If necessary, hollow out the most massive parts.
- Slow Drying: Let your piece dry slowly, away from drafts and direct heat sources. You can cover it with plastic for the first few days.
- Armature: If you use an armature, prefer aluminum wire or compressed newspaper, which are more flexible than wood and will follow the clay’s shrinkage.
This preventive discipline is at the heart of the patience that sculpture teaches.
When to sand your sculpture: the “leather-hard” stage you shouldn’t miss for finishing
The dialogue with clay is a matter of timing. There is a magical moment, a window of opportunity where the clay is neither too soft nor too hard: it is the “leather-hard” stage. At this stage, the clay has lost some of its water. It is firm to the touch, like a cold bar of chocolate, and no longer deforms under finger pressure. This is the ideal time for precision finishing. Attempting to smooth or engrave details on clay that is too fresh will only deform it. Waiting until it is completely dry makes it brittle and difficult to work with.
At the leather-hard stage, you can perform a multitude of delicate operations. It’s the perfect time to use a soft fan brush or a damp sponge to erase fingerprints and small imperfections. You can also use tools to engrave fine details or to burnish the surfaces. This is a meditative step where you sublimate the form you have created.
Once the sculpture is completely dry (it will be lighter in color and weight), final sanding can begin. Be careful—at this stage, the piece is extremely fragile. You must proceed with great gentleness. Forget coarse-grit sandpaper. Instead, use the scrubbing side of a dry kitchen sponge, or a very fine sandpaper (400 grit or higher), ideally by “wet sanding” to avoid dust. This final gesture will reveal the smoothness of the surface and prepare your sculpture to receive paint or wax.
It is in the mastery of these key moments that the sculptor’s patience is forged and the quality of the work is decided.
Why does mixing all your colors always result in a muddy brown?
After hours spent modeling the perfect shape, the coloring step can quickly turn into a nightmare. The beginner’s reflex is often to want to mix paints to get the perfect shade, but the result is almost always the same: a muddy, lifeless brown or gray. This is explained by color theory: by mixing too many pigments (especially the three primaries in equal proportions), you move closer to black, absorbing all the light. The dialogue with color requires as much subtlety as the dialogue with form.
Rather than trying to create flat, uniform blocks of color, which tend to flatten volumes, a much more effective and elegant technique is to work in layers to create a faux patina. This method, inspired by the natural aging of sculptures, uses very few colors to give an impression of depth and relief. It is particularly effective on air-dry clay which, once dry, becomes very resistant and can stand in for classic ceramics for a stunning result.
Here is a simple method using only three colors (ochre, black, white): 1. Start by applying a base coat (ochre, for example) over the entire surface. 2. Once dry, dilute a little black paint and apply it in the hollows and shadows of your sculpture to accentuate the reliefs. 3. Before the black dries completely, gently wipe away the excess with a dry cloth. The black will remain trapped in the hollows. 4. Finally, take a little white paint on an almost dry brush (“dry brushing” technique) and lightly stroke the ridges and most prominent reliefs. The result is a rich and nuanced patina that highlights every detail of your work, far from the muddy brown of haphazard mixes.
This simple approach transforms painting from a source of frustration into a powerful tool for expression.
How to sculpt for hours without pain: wrist posture?
The creative dialogue with the material is an immersive experience, but it can quickly become painful if you neglect the dialogue with your own body. Sculpture, even on a small scale, is a physical activity that intensely strains the hands, wrists, and forearms. “Sculptor’s tendonitis” is not a myth, and poor posture can turn a nascent passion into a source of chronic pain. Preserving your body is as important as preserving your work.
The first reflex to adopt is variation. Avoid staying frozen in the same position. The simple act of standing up and moving around your piece forces you to change your perspective on your sculpture and relieves your joints. To avoid wrist twisting, a minimal but revolutionary investment is the turntable. A simple “Lazy Susan” bought at Canadian Tire or IKEA will allow you to rotate your work effortlessly, keeping your wrist in a neutral and comfortable axis.
The ergonomics of your gestures are equally crucial. Alternate the grip of your tools so as not to over-stress the same muscles. Above all, establish a discipline of regular breaks. Every 30 minutes, stop, stand up, and take two minutes to gently stretch your wrists and fingers by performing rotations and flexions. Also, remember to warm up well before starting. Like an athlete before a workout, a few minutes are enough to prepare your hands for the work ahead and prevent many ailments.
By taking care of yourself, you ensure that the pleasure of sculpting can accompany you for many years to come.
Key Takeaways
- Air-dry clay is the most accessible and flexible ally for any beginner without a pottery kiln.
- The secret to a successful sculpture lies in managing moisture and timing: wedge to expel air, and finish at the “leather-hard” stage.
- Your final choice between clay and wood should not be technical but sensory: do you prefer the additive and spontaneous dialogue of clay or the patient and subtractive listening of wood?
Finishing: enhance or leave raw? Options for clay and wood
The final step of your dialogue with the material is the finishing. This is what will protect your work, reveal its texture, or, conversely, transform it. Whether you have chosen the generosity of clay or the listening of wood, the options are numerous and must be chosen based on the desired final look. This is also when we can address the dialogue with wood, often perceived as more intimidating. To start, softwoods like basswood or Canadian white pine are ideal because they can be carved without excessive effort.
Acrylic paint is the most versatile option. With high coverage, it is perfect for clay, as it allows for hiding small imperfections and offers an infinite color palette. Applied to wood, it creates a modern, opaque look. For a more natural approach, especially on wood, stains, inks, or oils are preferable. Canadian linseed oil, for example, will deeply nourish the wood and beautifully bring out its grain, offering a natural and ecological finish. For a soft, satiny touch on both clay and wood, beeswax is a simple and pleasant solution to apply.
The following table summarizes the options to help you choose the final touch for your creation.
| Type of Finish | Ideal Surface | Advantages | Final Look |
|---|---|---|---|
| Acrylic paint | Clay and wood | High coverage, hides imperfections | Matte or glossy depending on varnish |
| Stains/Inks | Softwood | Shows the texture of the material | Transparent, nuanced |
| Beeswax | Clay and wood | Natural, easy to apply | Satin, soft touch |
| Canadian linseed oil | Wood (basswood, pine) | Ecological, enhances the grain | Natural, deep |
Non-finishing as an aesthetic choice: the pleasure of simply burnishing clay or sanding wood until it achieves a silky touch allows one to focus on pure form rather than color.
– Meditative approach to sculpture
In the end, the boldest choice is sometimes the absence of a finish. A perfectly sanded piece stands on its own, celebrating the raw beauty of the material and the honesty of the gesture.